Walter
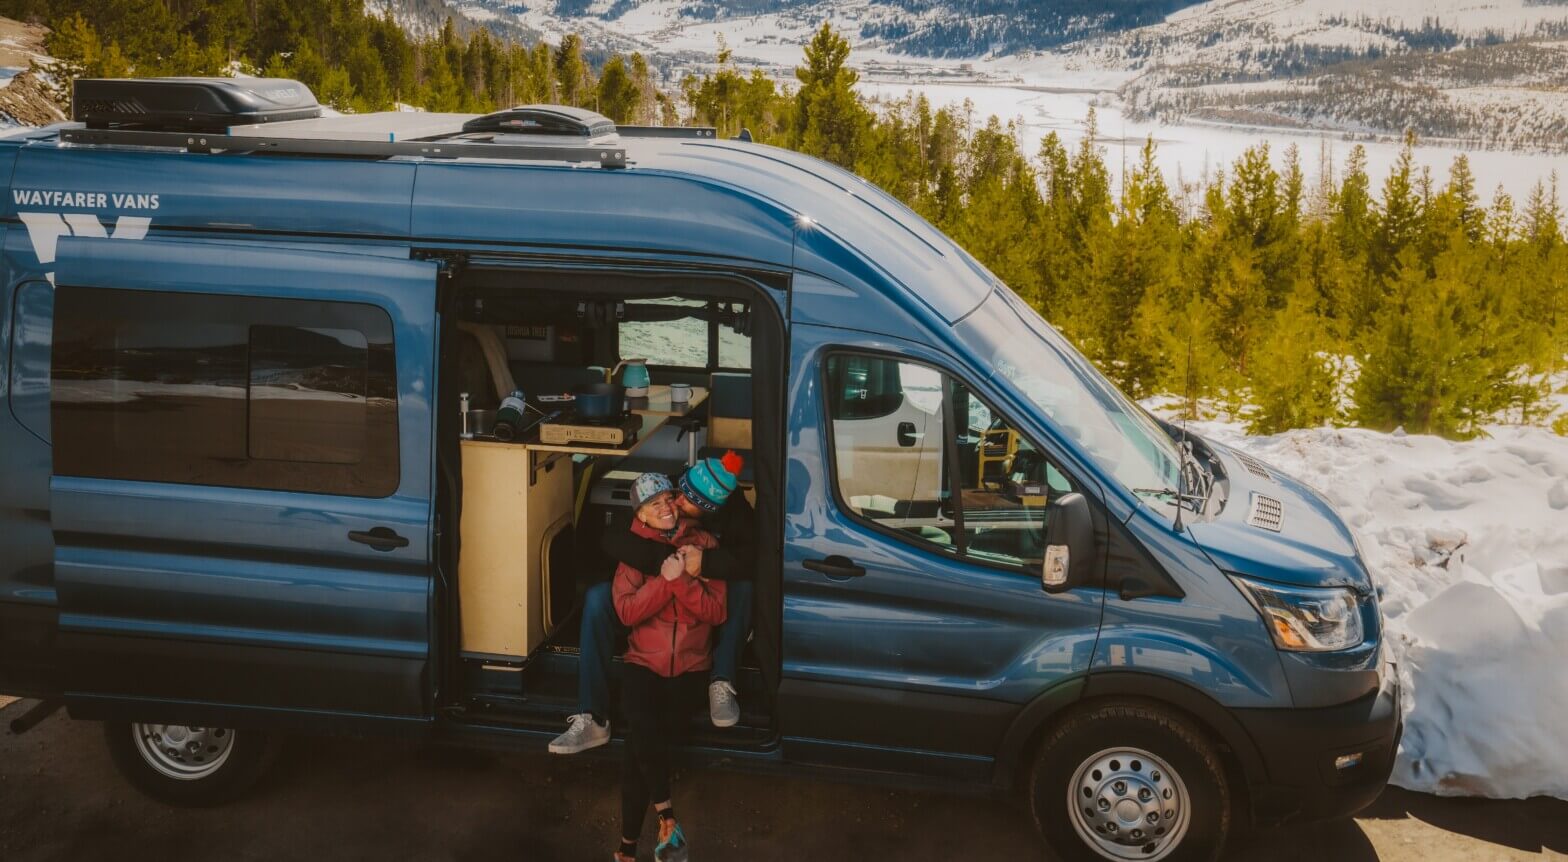
RAM ProMaster
136″ WHEELBASE, HIGH ROOF
After you get settled in with your new Wayfarer Van, you might soon start wondering, “How can I add electrical and solar to this set-up?” And if you’re anything like me, the idea of figuring out the proper set up of electrical wiring, batteries, and solar for your powering up needs can start to feel super overwhelming.
I took enough Physics classes in high school and college to understand that “electrical engineering” is not my forte. Ampere, capacitance, alternating current, voltage, hertz, circuit, series… these are all words that I’m very happy to leave out of my day-to-day vocabulary.
That is until, we decided to do this whole “living in our van” thing full-time and realized we would need to add solar to our van in order to stay charged up on the road since we would not only be charging our computer batteries and camera batteries, but we would also need to charge our new Dometic fridge, fan, and installed electrical lighting.
Looks like I should’ve paid more attention in Physics class.
However, now that we’re at the other end of the seemingly daunting task of “adding solar and electrical” to our van, I’m happy to report that it’s not so bad after all.
In fact, most of you don’t need a fully decked out system anyways and can get by with a much simpler set-up to start with.
In this post, I’m going to try and help demystify it all for you, and in true Wayfarian fashion. I’m going to teach you how to keep your system simple and modular so it can grow with you and your needs over time.
On the low end, you’re likely just looking to only power some electronics during your weekend, and at the high-end you may be looking to power lighting, a fridge, your vent fan (though this can also be wired directly into the van), and your electronics for a fully “Off-the-Grid” experience. The great news is, most of these powering systems really are much simpler than you’re thinking.
I recommend starting small. Even if you envision yourself having a fully off-the-grid system one day in the future, you don’t have to have it all figured out right away. Start with the basics and add on if you find you need more.
So here’s how this is going to work: I’m breaking this piece down into 3 categories:
Ask yourself, “What am I wanting to power on the road?”, and then check out some of the options we’ve suggested below to find a good fit for you and your needs. After reading through this you may find that you don’t really need a fancy set up at all.
Either way, we’ve got you covered.
HOW TO KNOW THE “WEEKENDER” SETUP IS RIGHT FOR YOU:
This setup is perfect for you if you primarily only use your Wayfarer Van on the weekends and are an avid Weekend Warrior Adventurer. Michael and I were pretty much in this camp for a full year prior to hitting the road full-time in our van.
This system assumes you have only basic powering needs like charging phone and camera batteries, but depending on the Power Bank you buy, it could also power up a Dometic fridge, lighting, and a vent fan if you have one. However, if you’re looking to keep things more affordable, you can certainly start with a cheaper Yeti solution, use a normal cooler, and turn on your headlamps in the evening for lighting. Classic weekend warrior style.
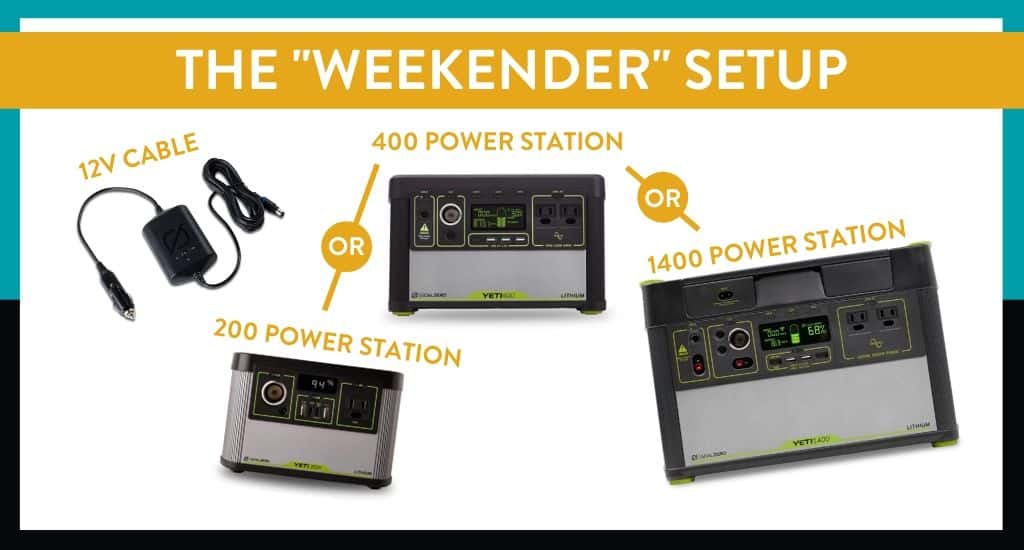
WHAT YOU NEED:
HOW TO SET IT UP:
Charge your Goal Zero in advance of your weekend, then put it into your van when you hit the road! We have a 12V plug in the back of our van, so we like to plug ours into that anytime we are driving. Charge devices as needed by directly plugging into your Goal Zero.
OTHER NOTES ON THIS SETUP:
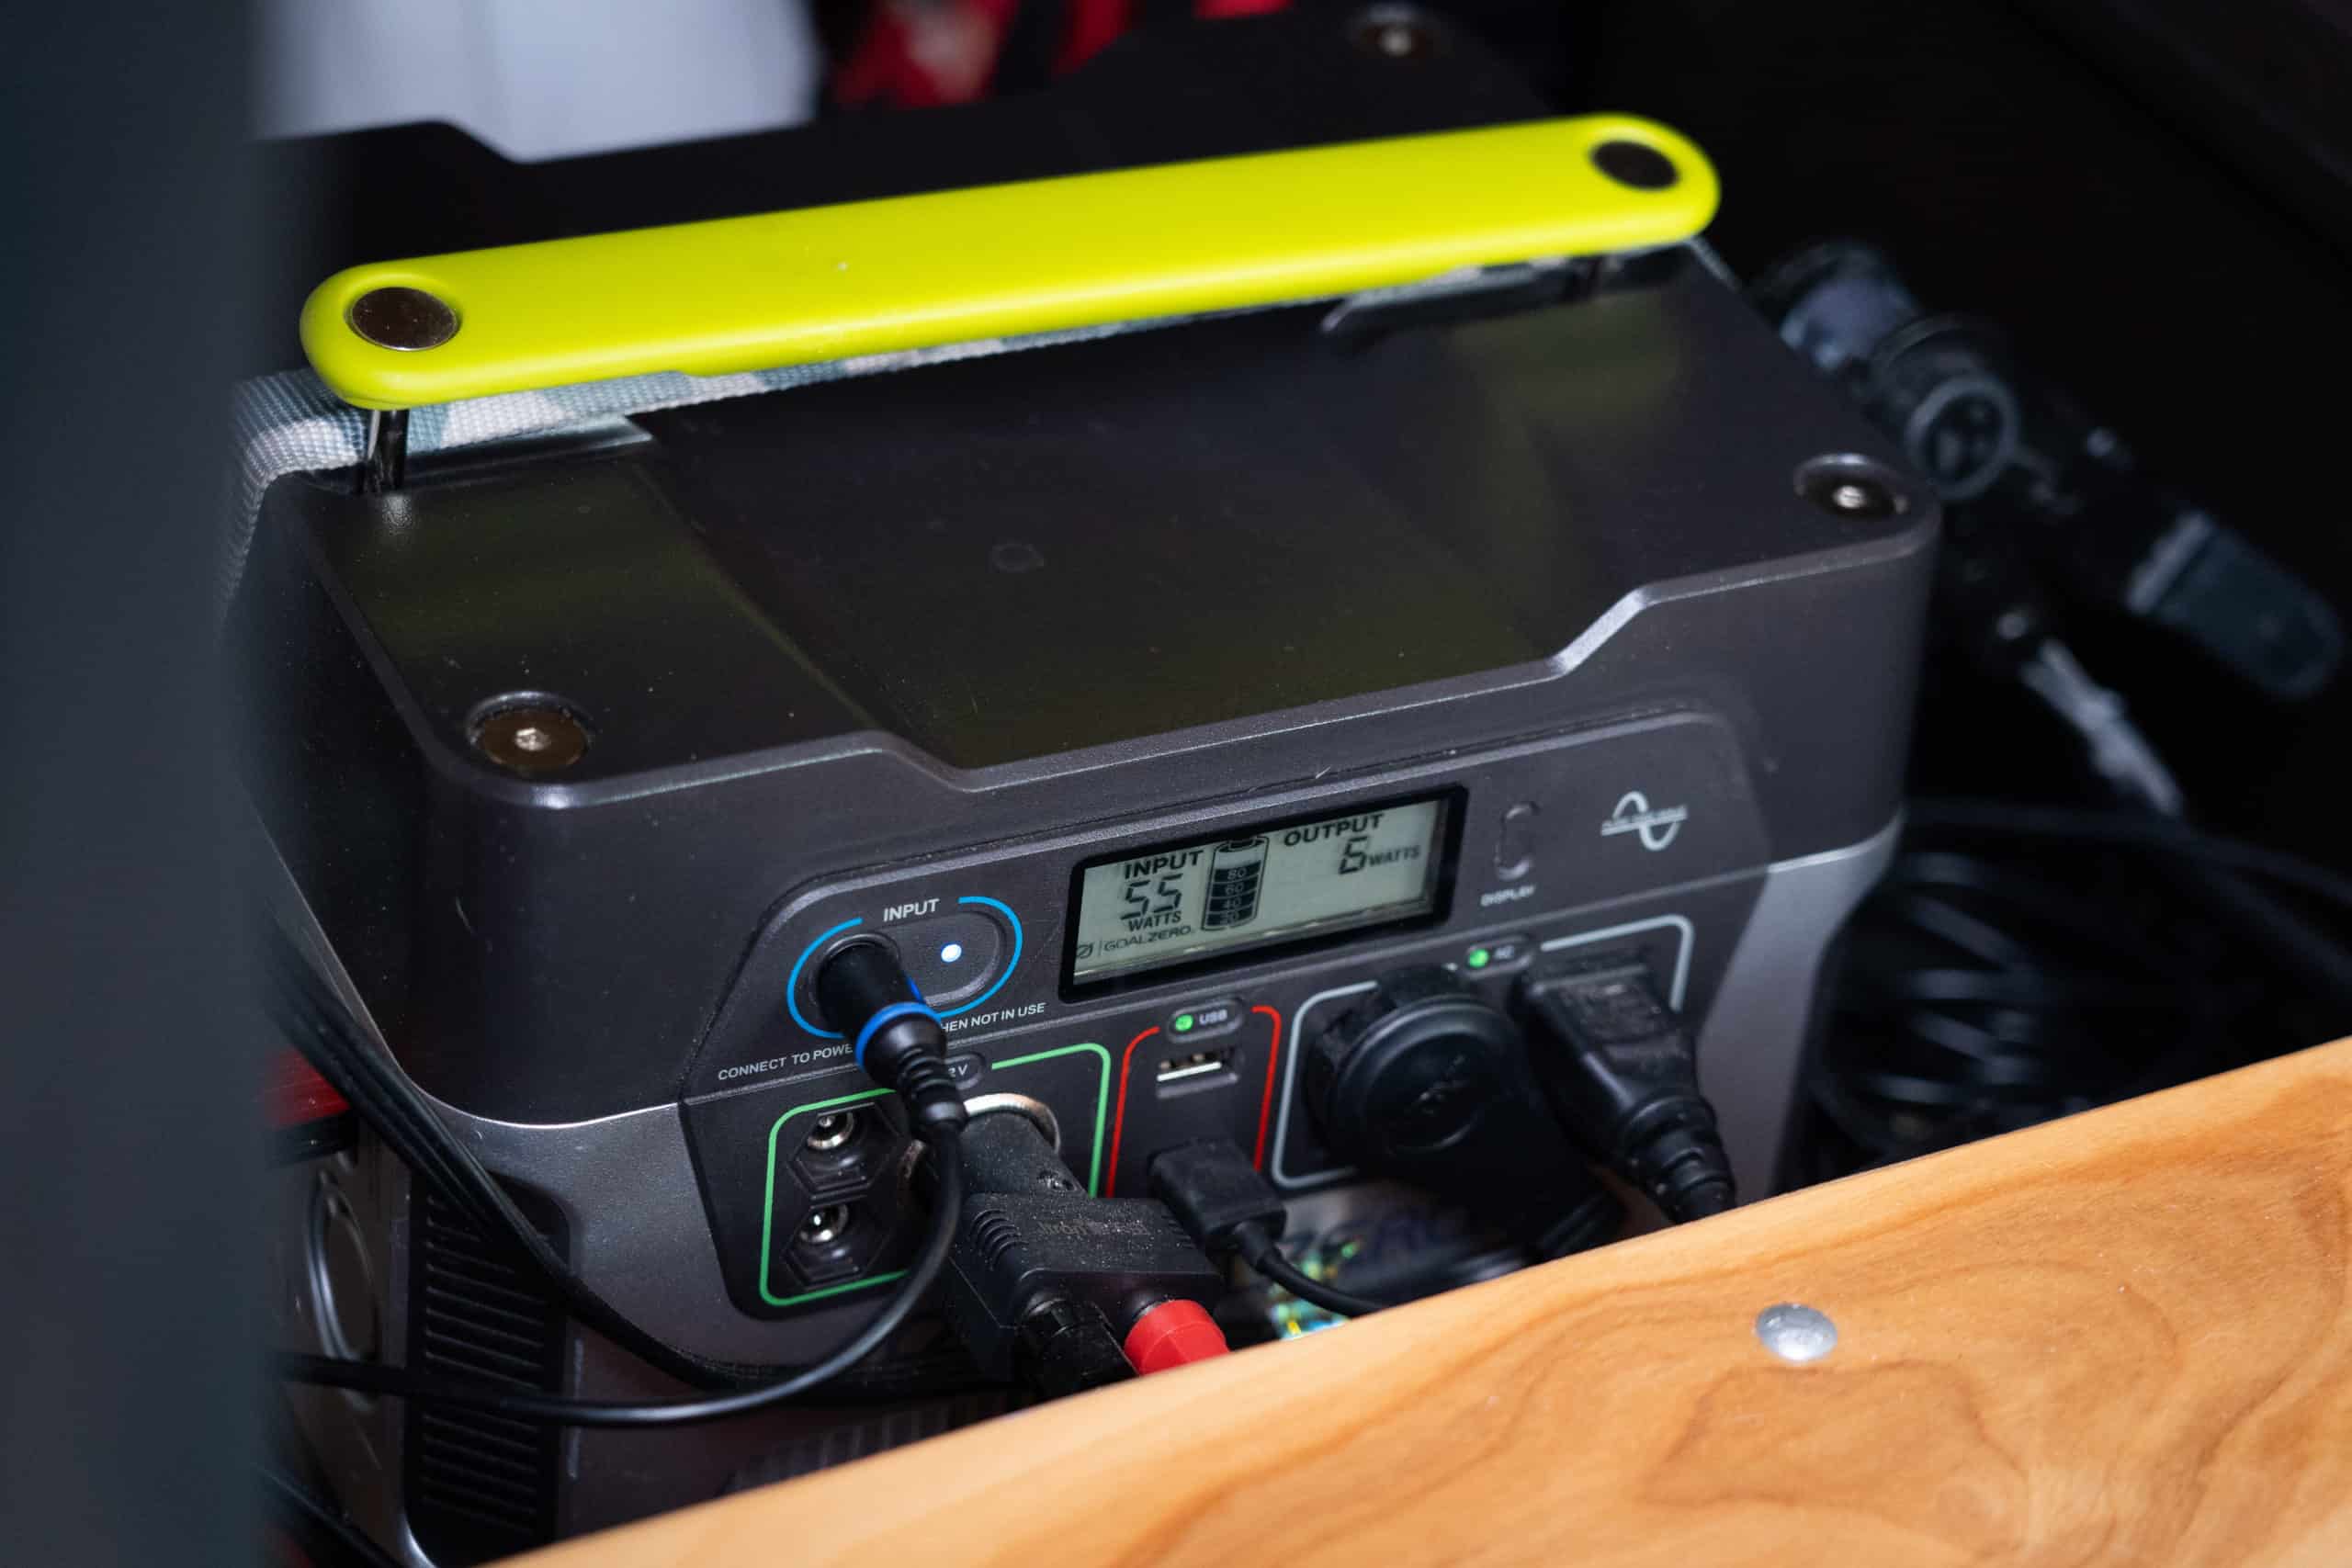
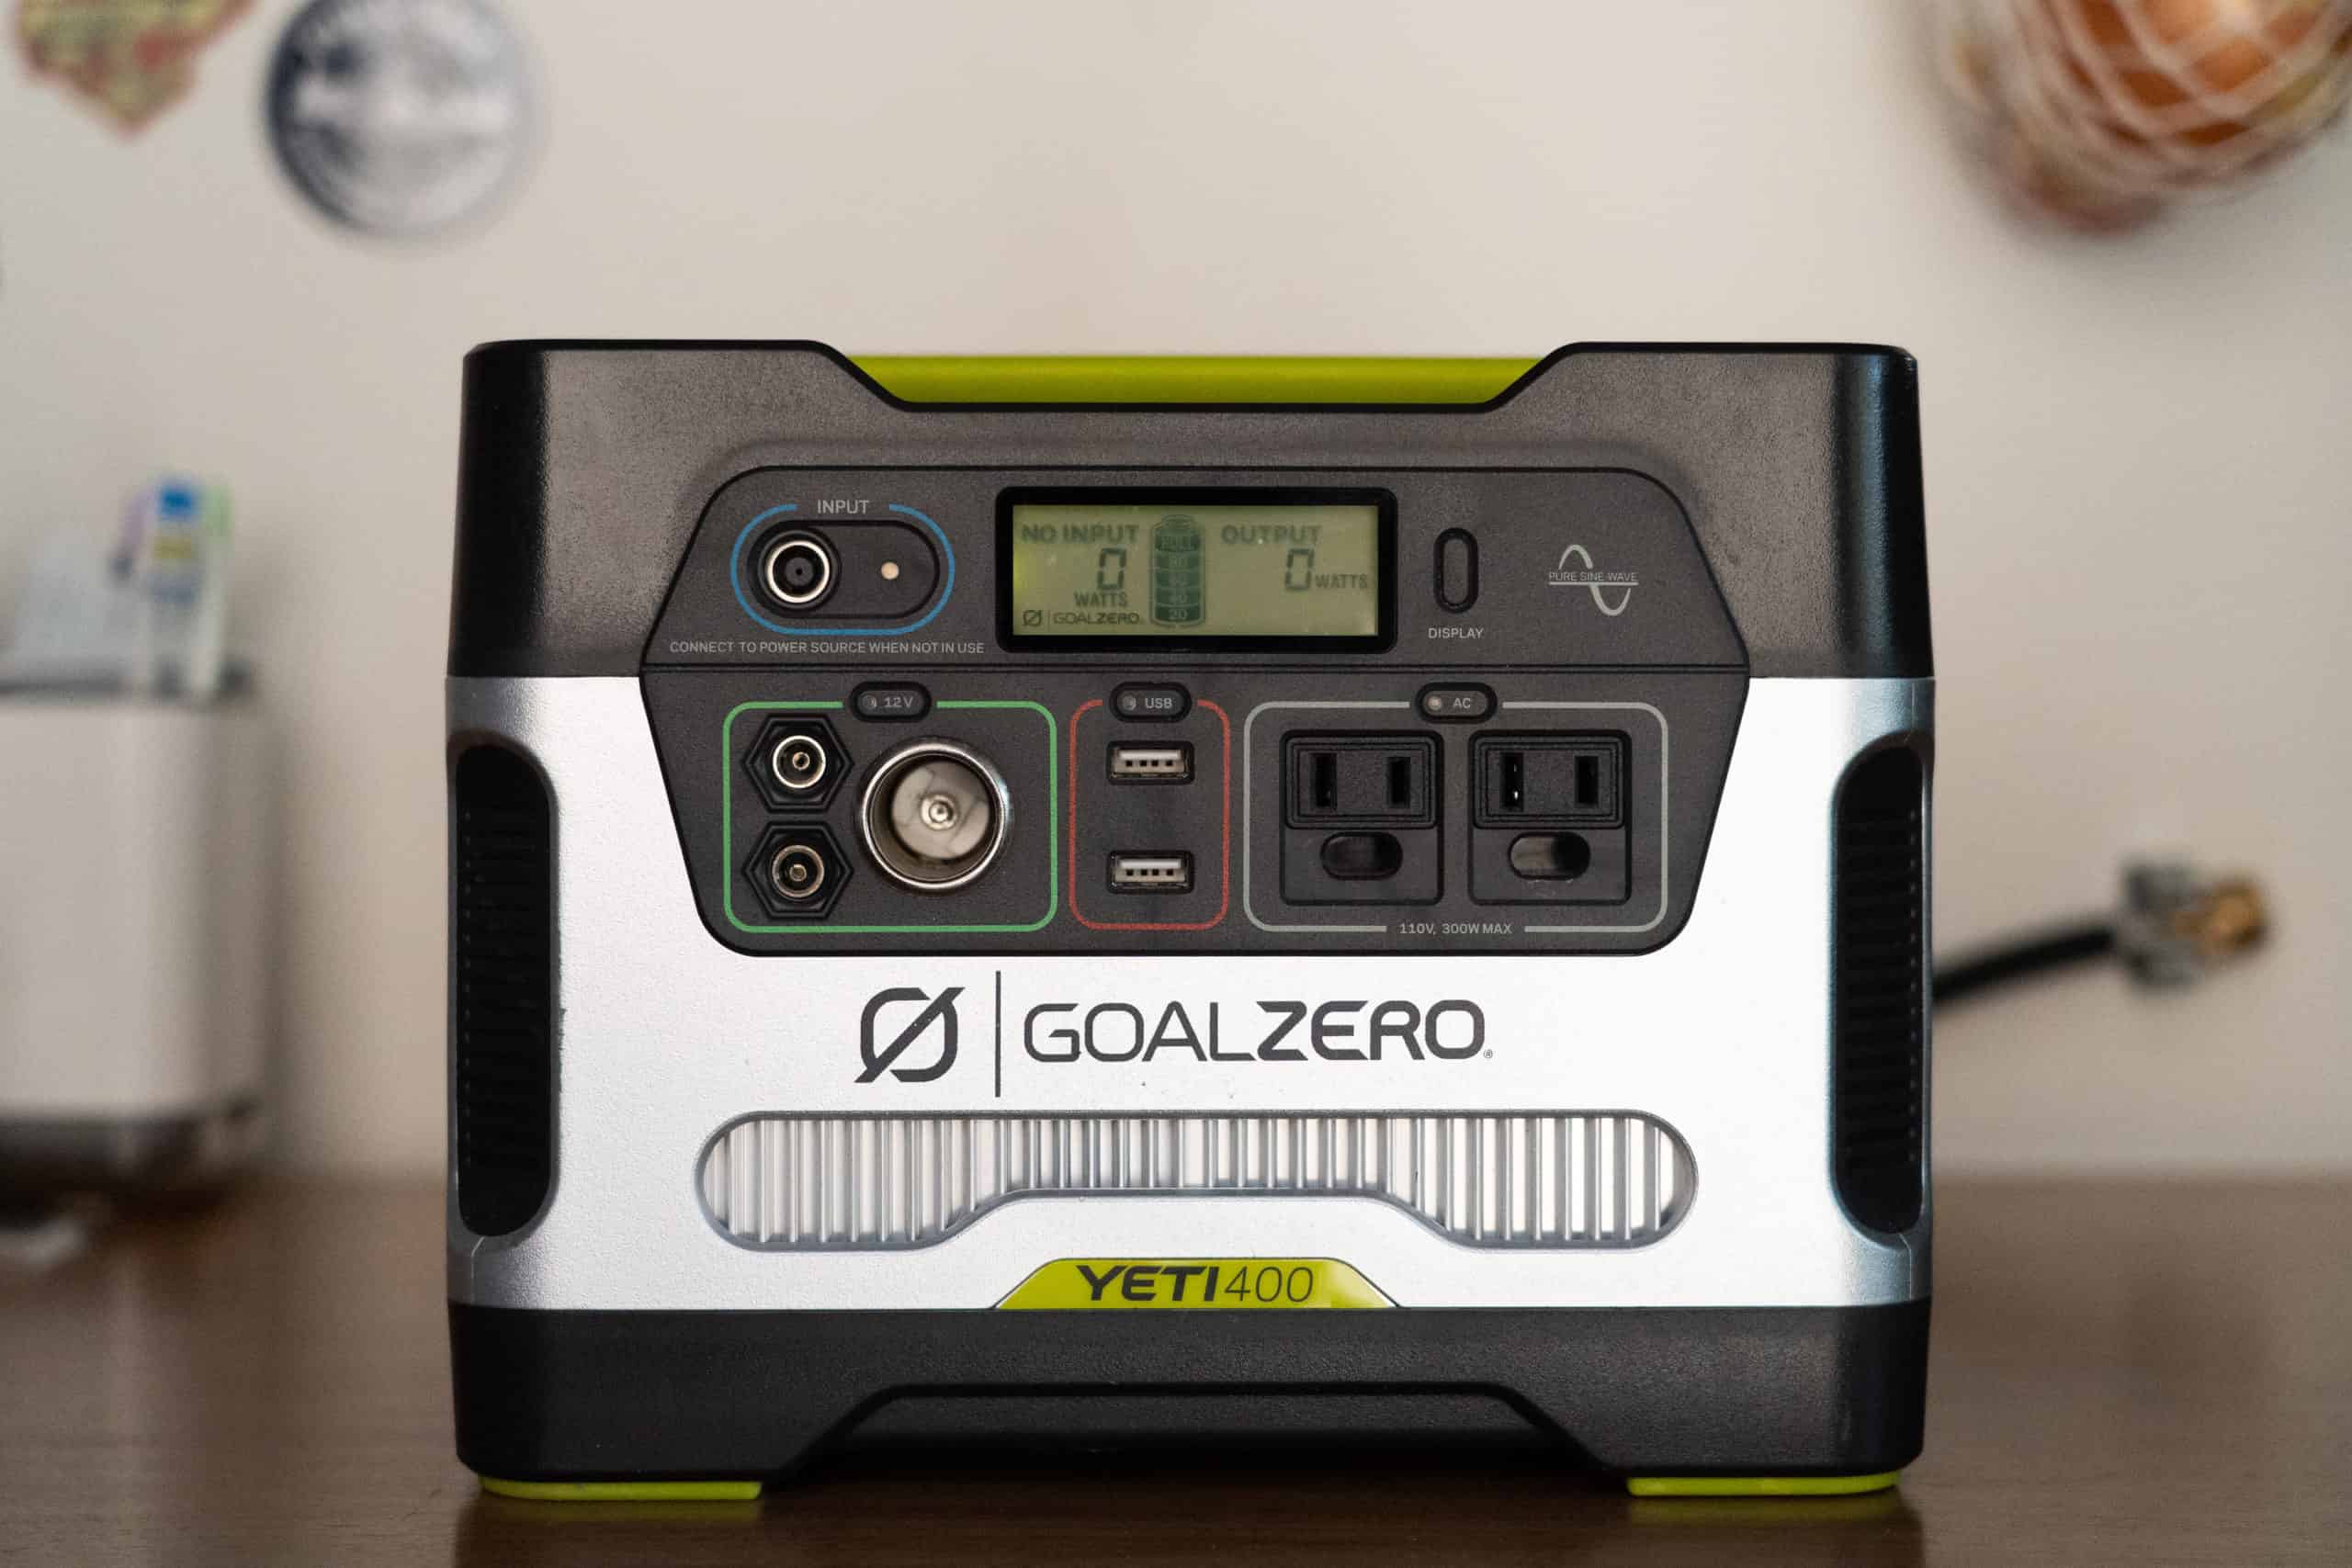
Michael and I’s Setup: Michael and I were “gifted” a Yeti 400 for Christmas when we bought our Wayfarer Van, and this suited our Weekend Warrior needs just fine. We also never started out with solar. When we transitioned to full-time travel in our van, we were able to use this Yeti 400 and link it to extra batteries to create a greater capacity for our full time set up. If we were starting from scratch and knew we would be going full-time, we’d likely start with the Yeti 1400 or the Yeti 3000. However, our system works just fine with the 400. We will explain this more under the “Full-Timer” Category.
You really don’t need solar: You do not need solar panels for the Weekender setup, because more than likely your battery will stay sufficiently charged all weekend, especially if you have that 12V cable. Then after the weekend is over, bring the Yeti back inside to get fully recharged.
HOW TO KNOW THE “VACATIONER” SETUP IS RIGHT FOR YOU:
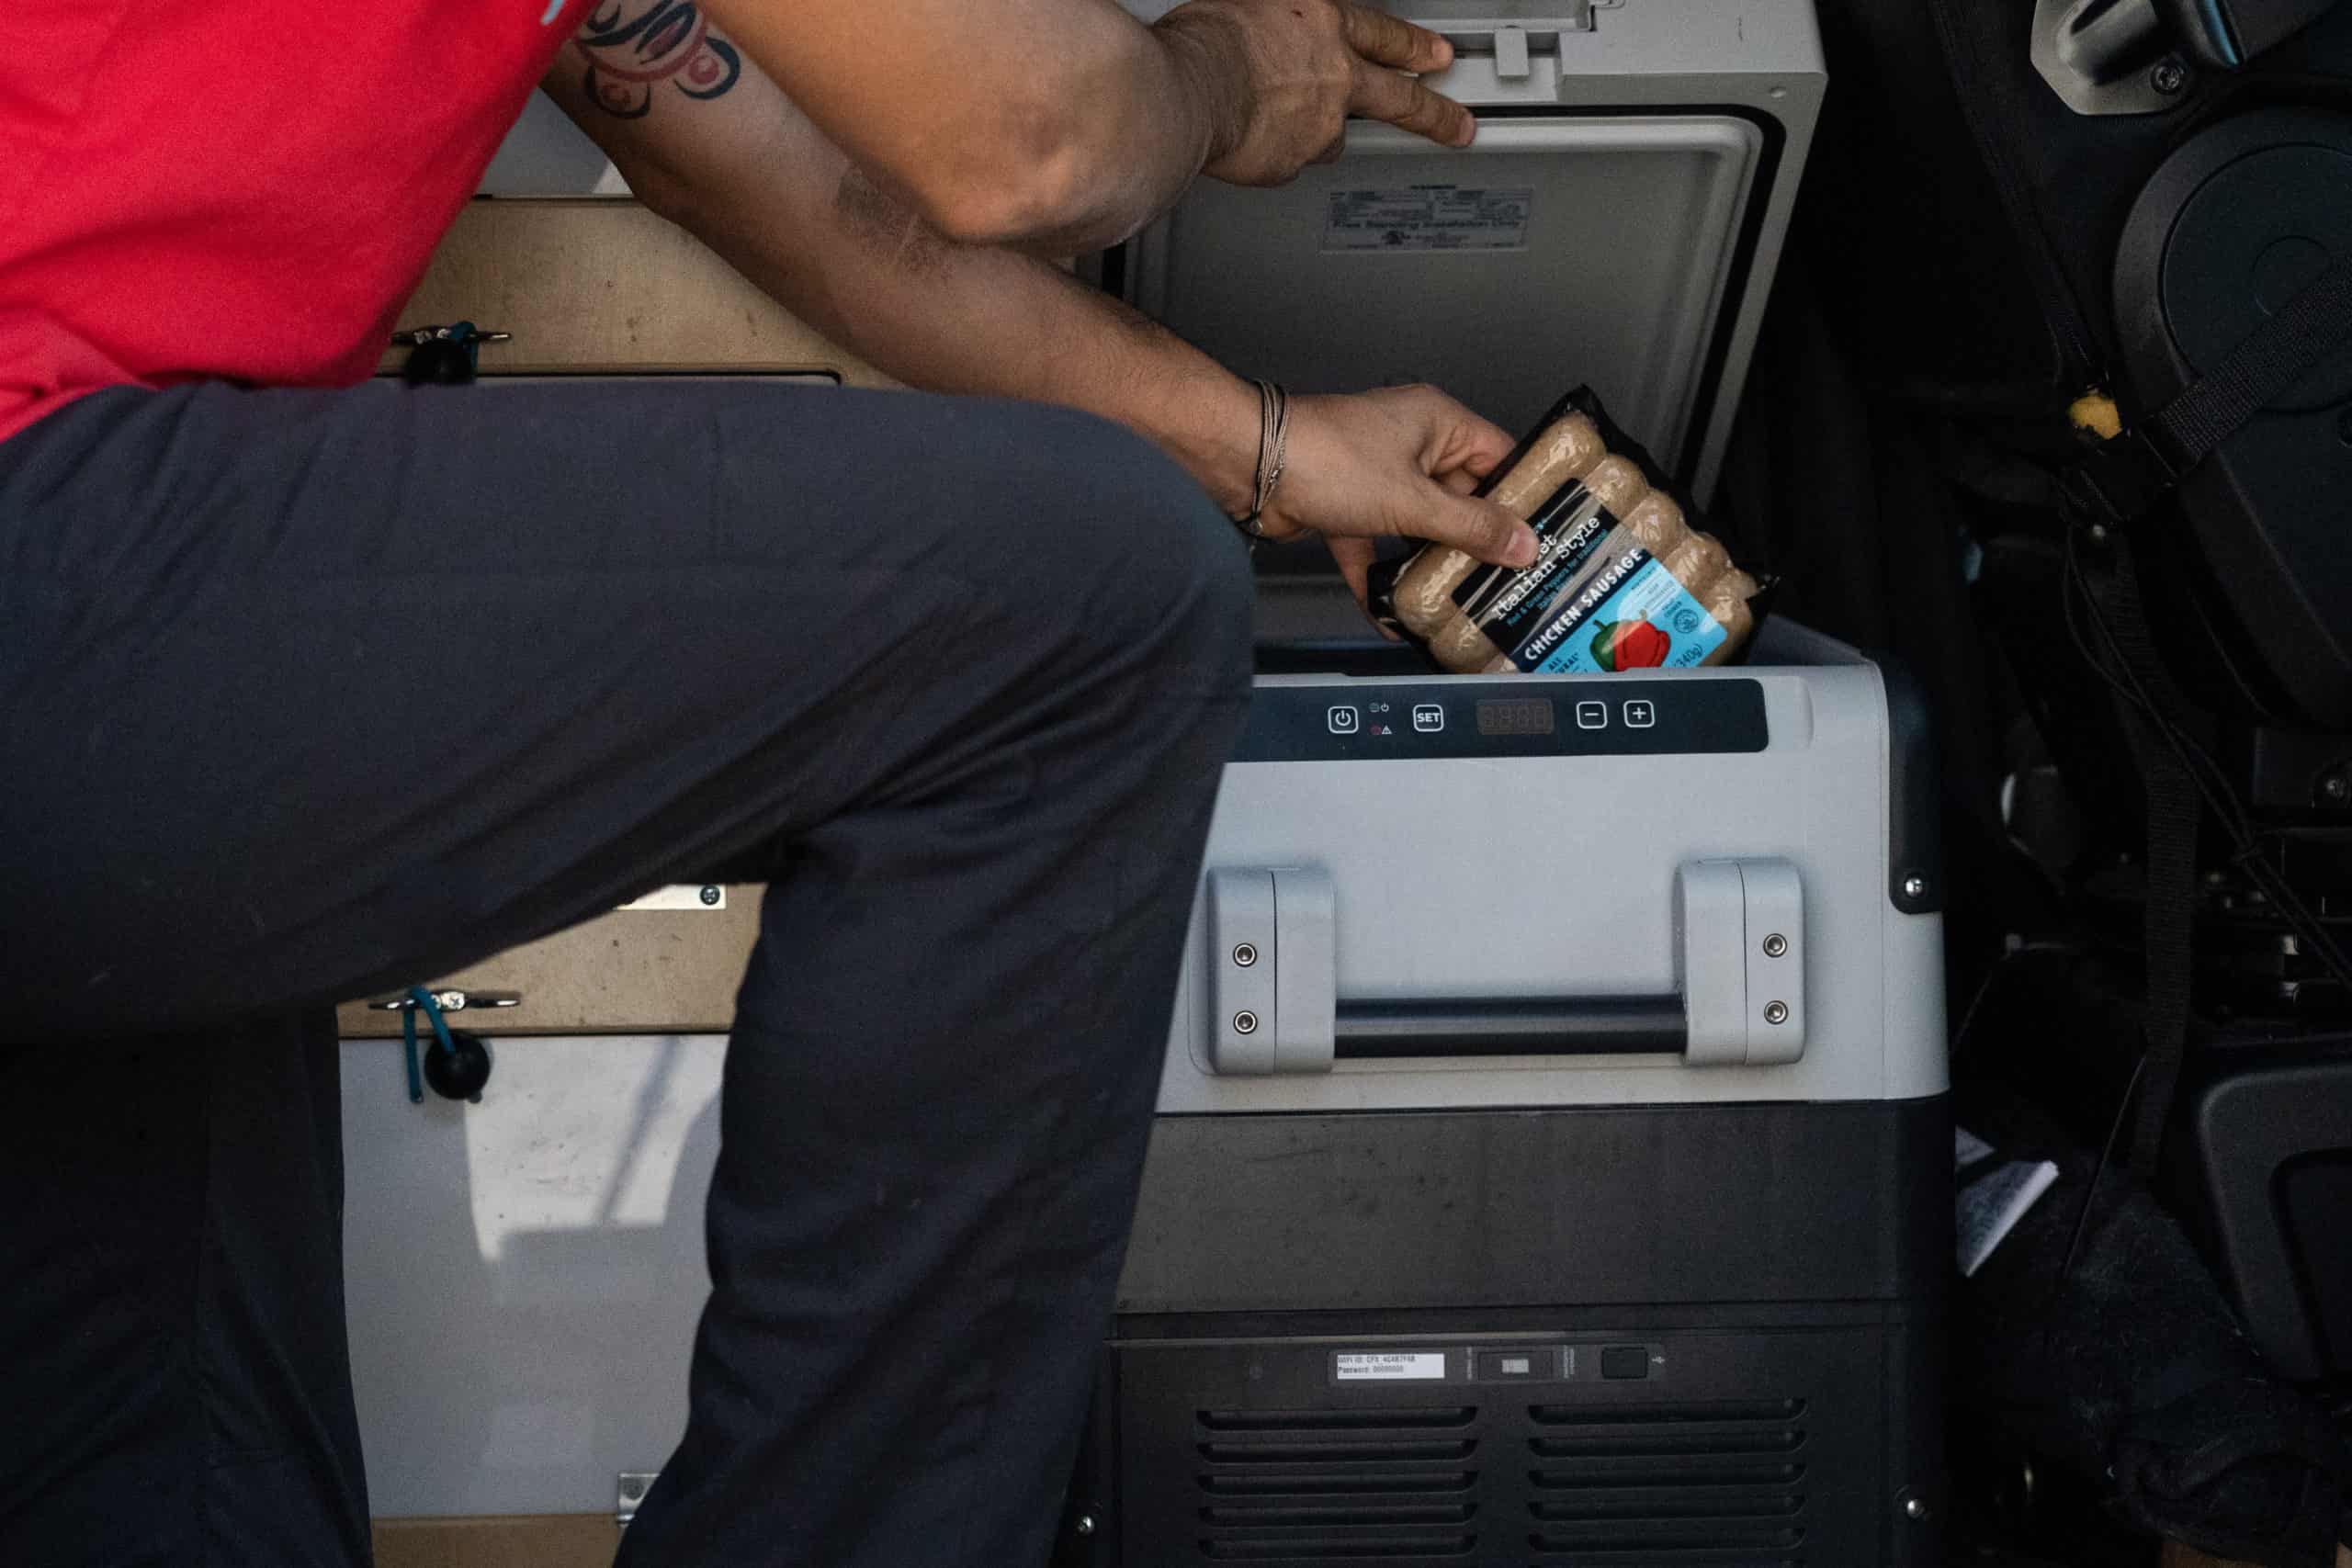
This setup is right for you if you know you want to take your Wayfarer van for 1-2 week Off-the-Grid Vacations, and want a few extra amenities in your powering setup including: lighting, an electrical fridge like the Dometic, and your vent fan.

WHAT YOU NEED:
HOW TO SET IT UP:
As simple as the Weekender is to setup. Fully charge your Goal Zero in advance of your vacation, then put it into your van when you hit the road! Keep device plugged into a 12V plug as you drive to recharge during your trip. Charge devices as needed by directly plugging into your Goal Zero.
OTHER NOTES ON THIS SETUP:
Still curious on the battery life of this set up? Read Ian’s power-test example here.
HOW TO KNOW THE “FULL-TIMER” SETUP IS RIGHT FOR YOU:
If you know you’re going to be living long-extended periods of time out of your Wayfarer van or you just geek out on having a fully off the grid system that can power up all of your van-living needs, then this is the setup for you.
Surprisingly you can keep this setup very simple as well if you’d like, or make it more complex by integrating solar panels directly into your roof. The choice is yours, and we’ll give you some guidance and resources on making all your off-the-grid dreams come true.
The first thing we recommend is calculating your power needs. It’s a bit more involved, but can help you figure out just exactly the system you’ll need for your rig. We recommend using this solar calculator to help you figure this out.
Michael and I power a vent fan, LED lighting, a Dometic CFX 40, an electrical water pump, and all of our phone/computer/camera gear charging with our system and we found that we needed only around 2000 Watt-Hours.
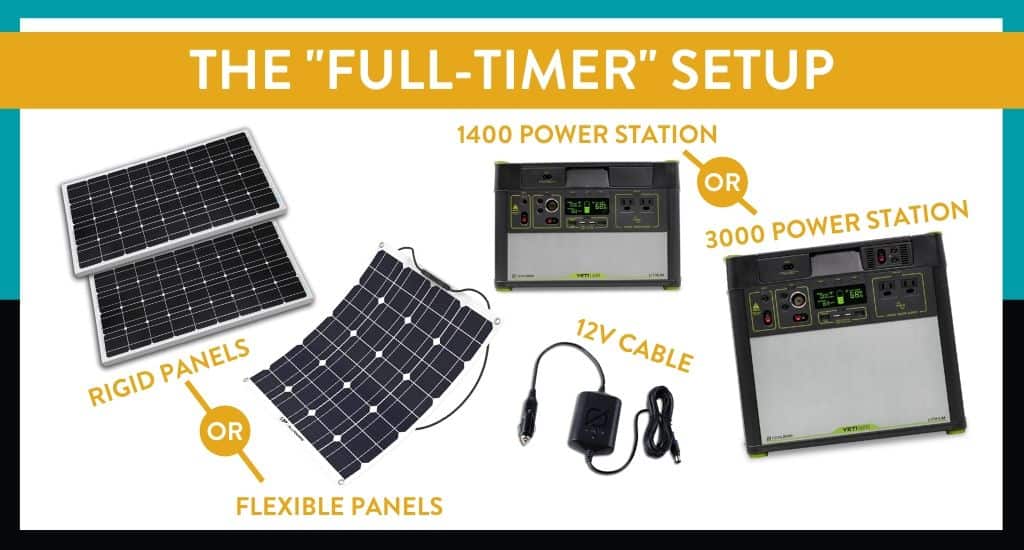
WHAT YOU NEED:
HOW TO SET IT UP:
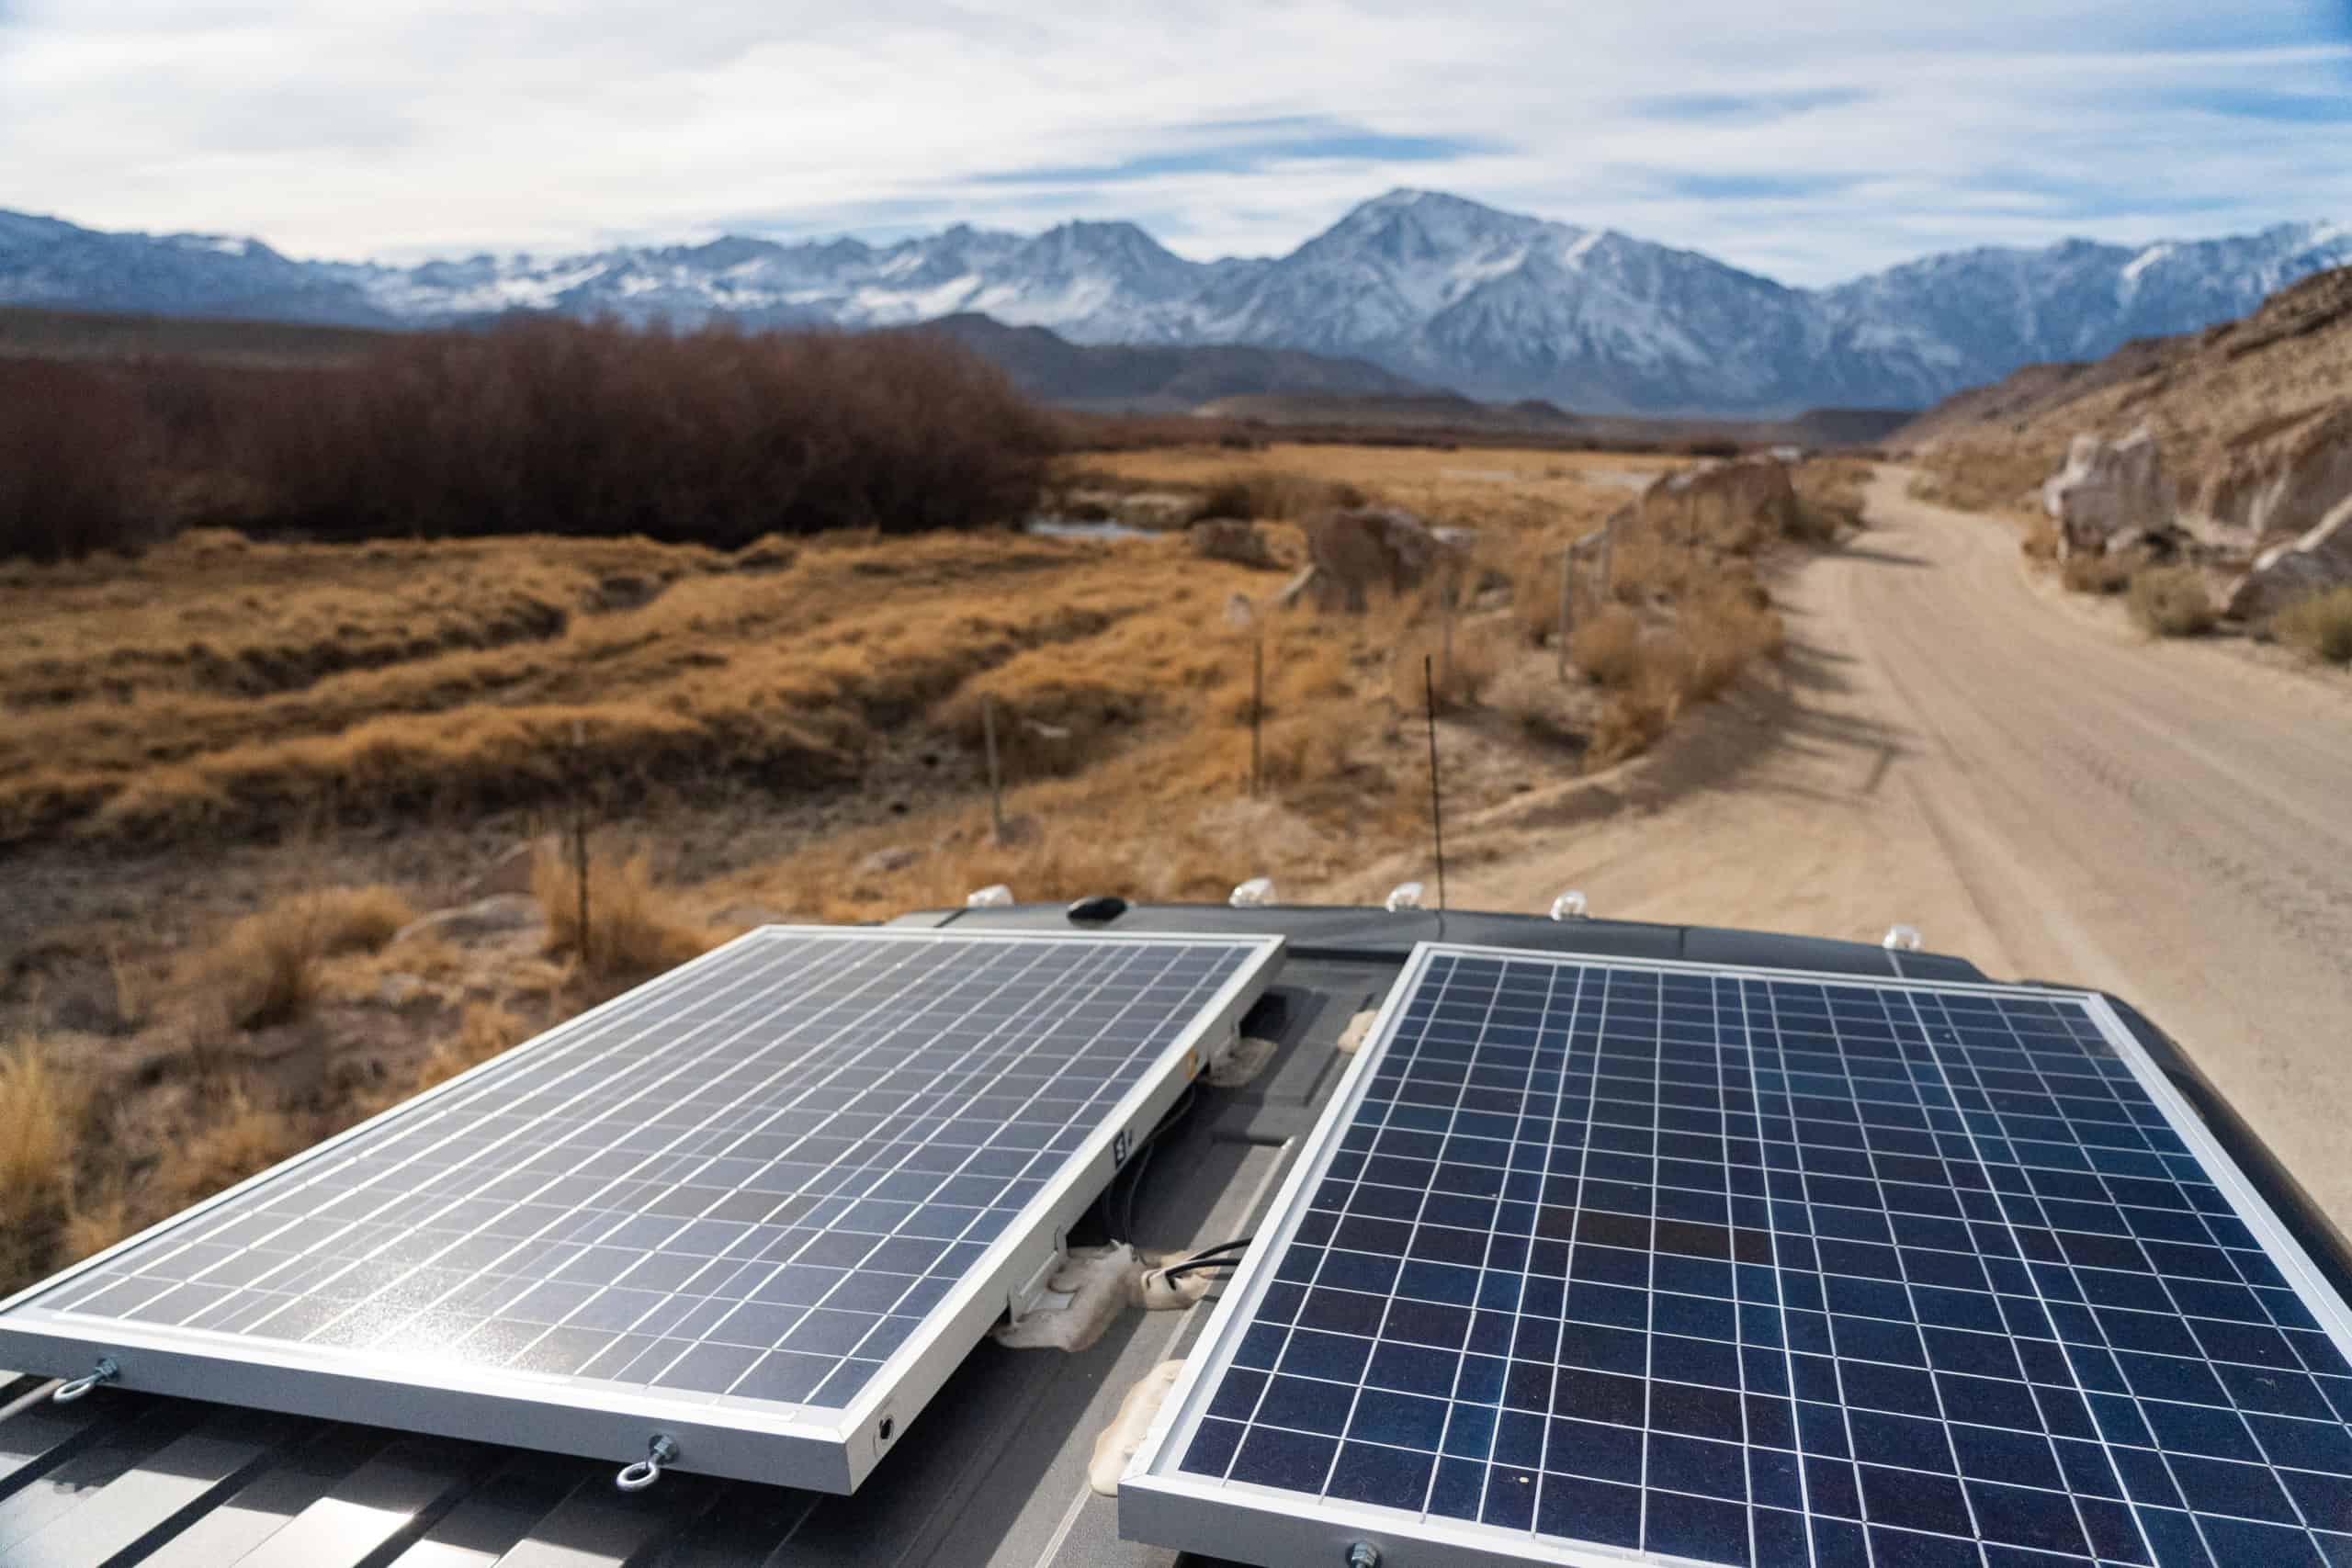
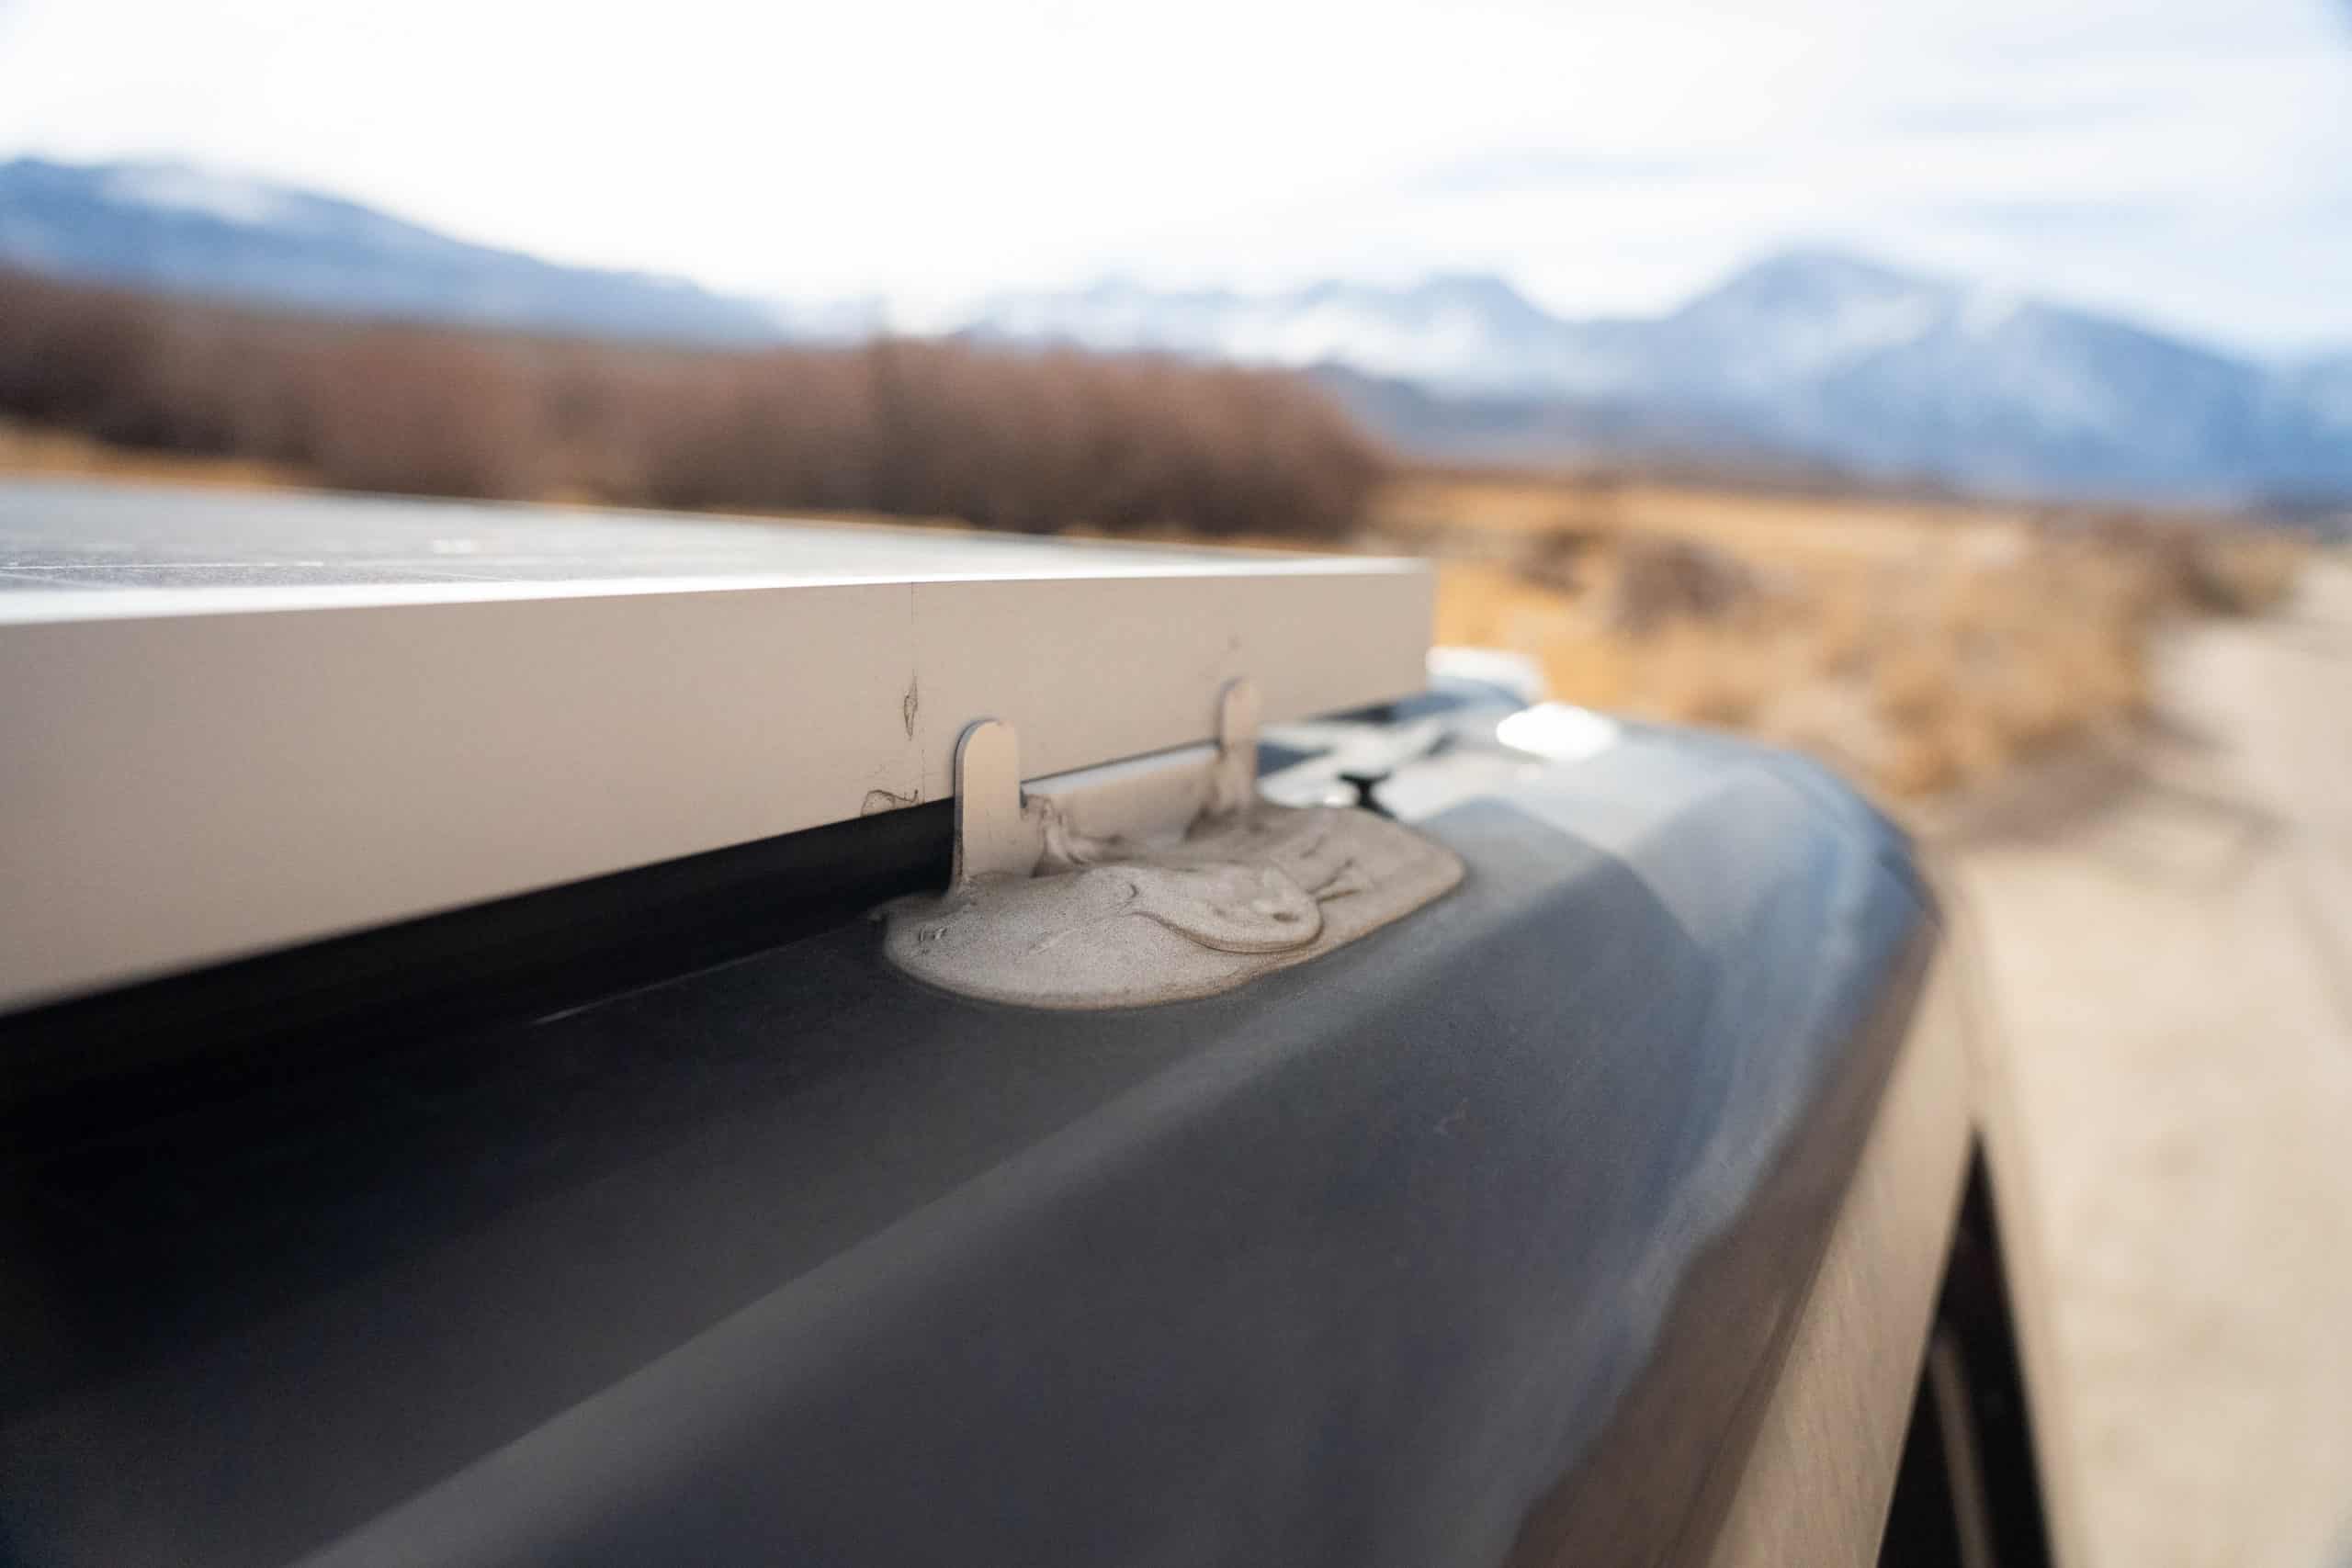
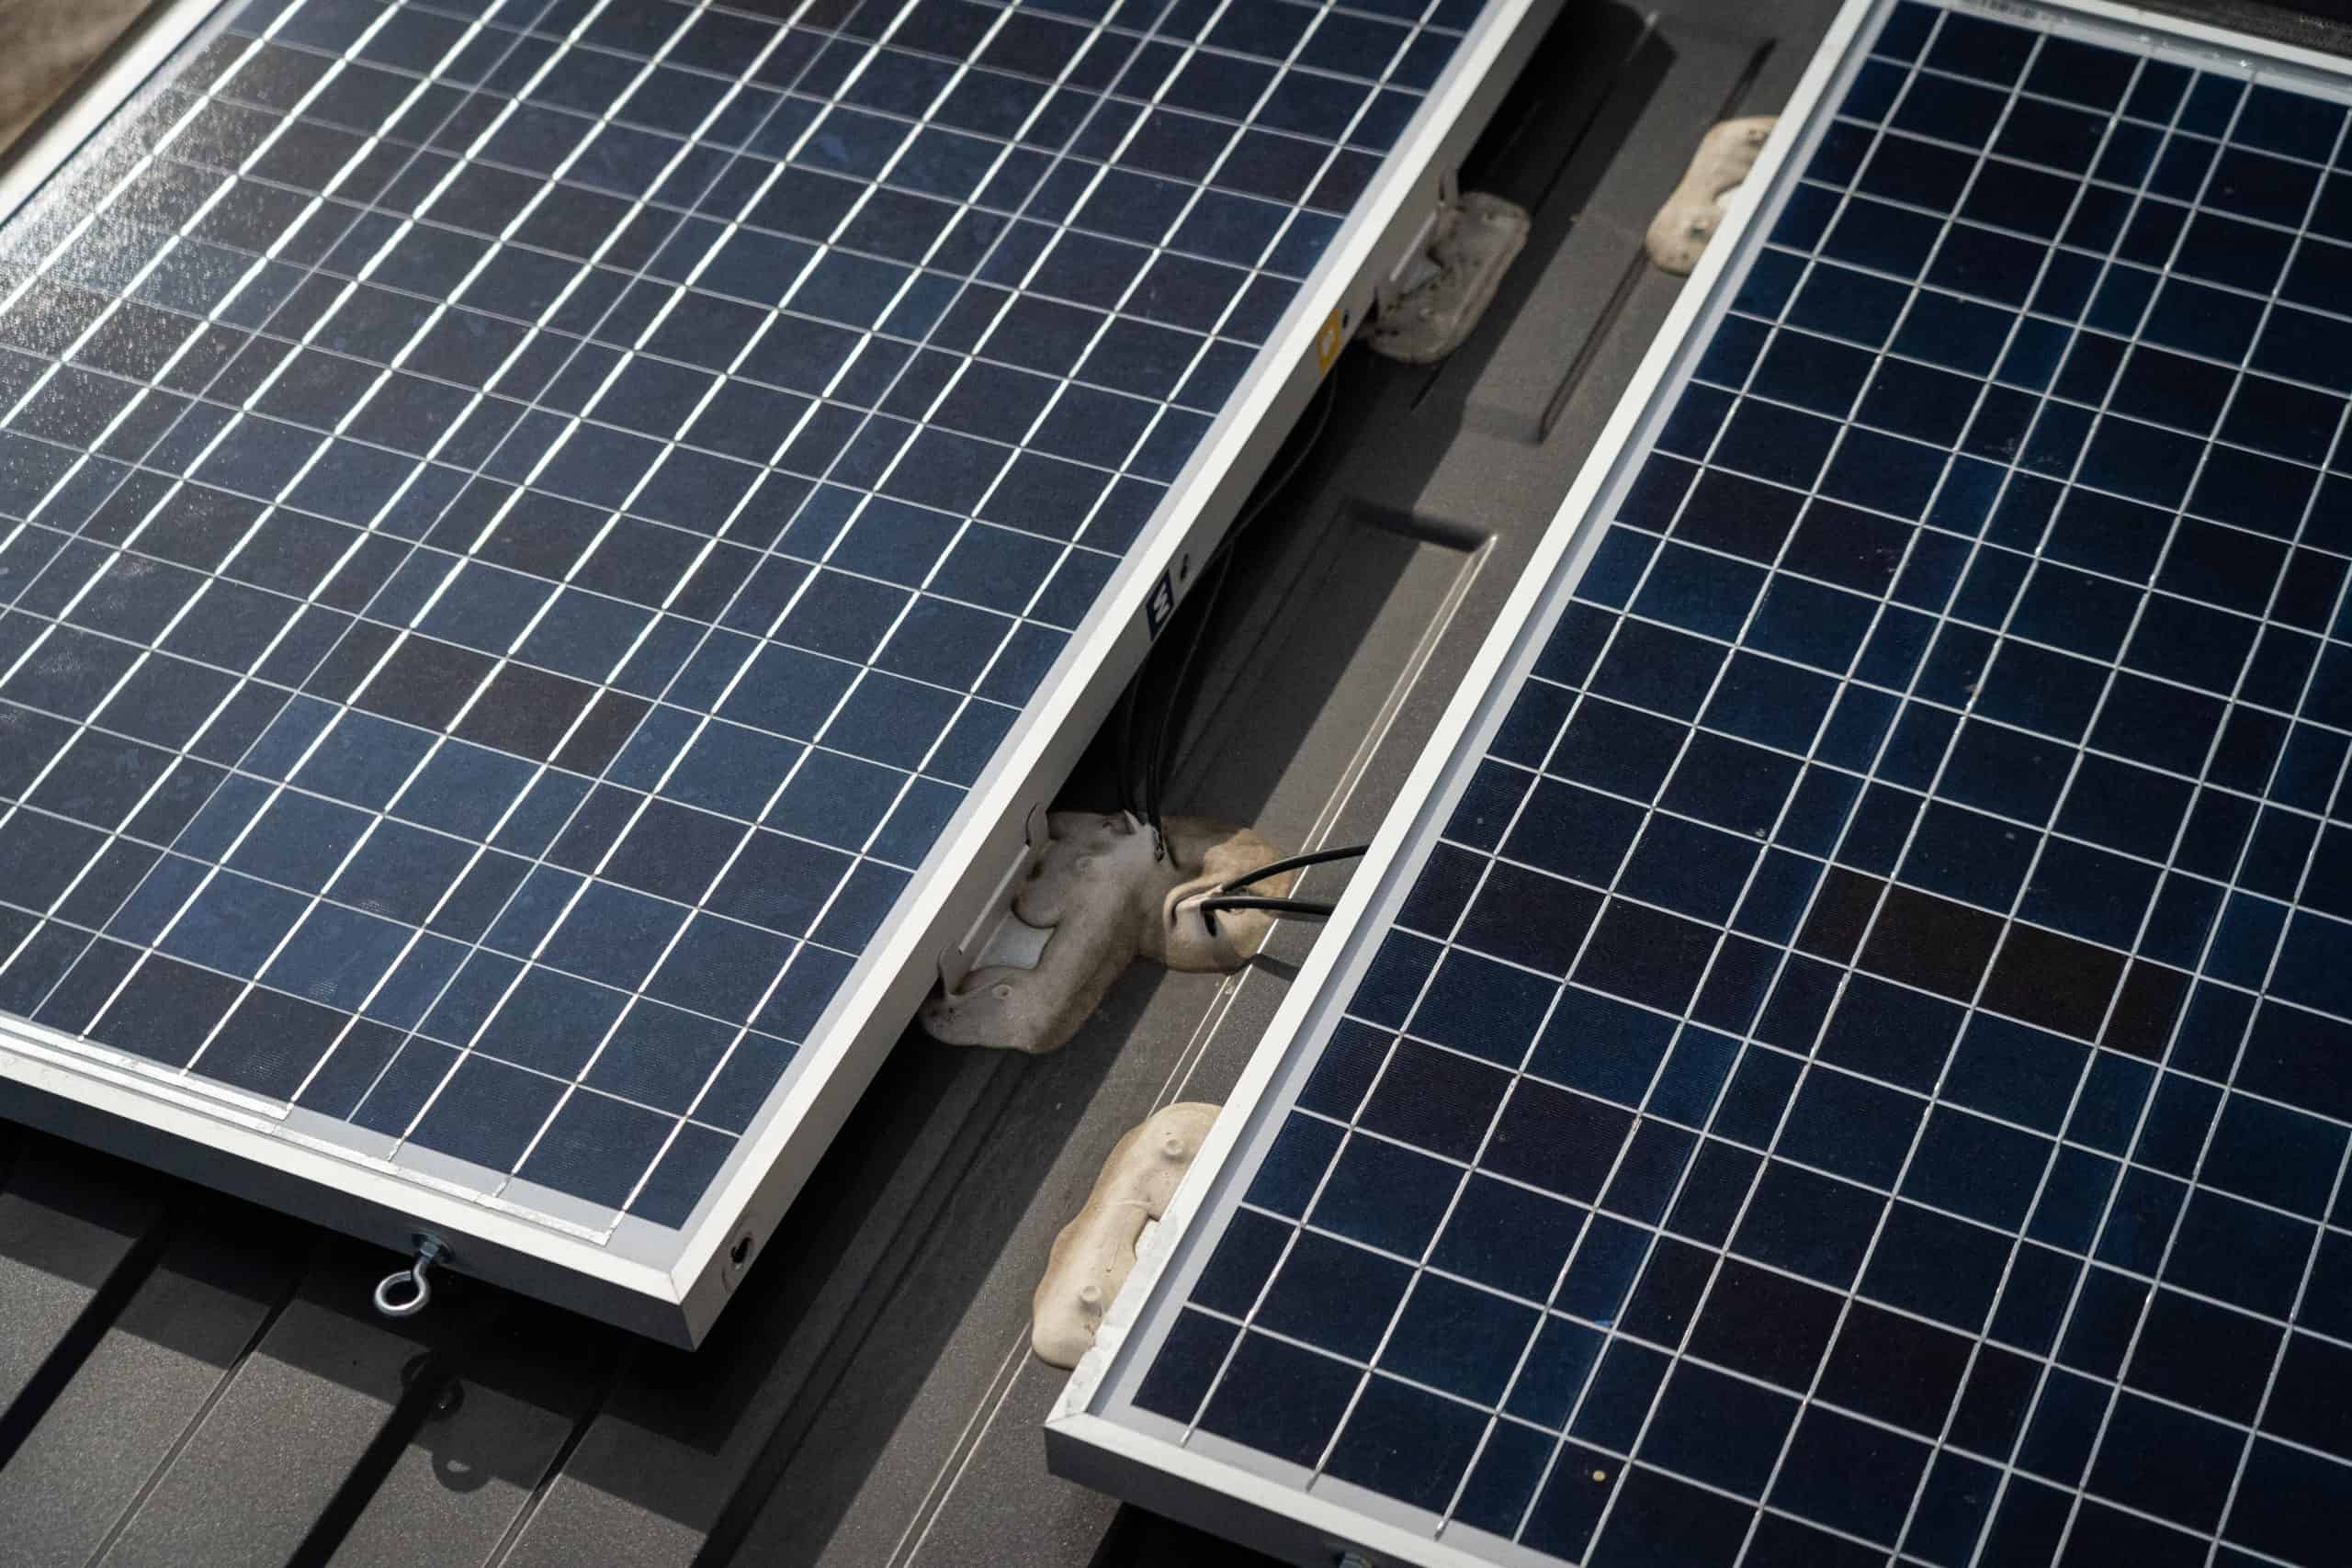
As you can imagine, the most complicated part of set-up for this system is installing your solar panels to your roof and fixing the wiring so it’s out of the way in the van. There are 2 main ways you can install your panels: You can either install with an “adhesive” (in order to avoid drilling fewer holes into your van) or you can purchase hangers and drill your solar panels directly into the roof of your van.
From there, you’ll just need to hook up your panels to your Power Bank (you may find you need an extension cord for this), and then you’re good to go. We never remove our Goal Zero from the van since we have a full-timer setup in our van. Our batteries stay charged with solar and the 12V plug on cloudy days.
OTHER NOTES ON THIS SETUP:
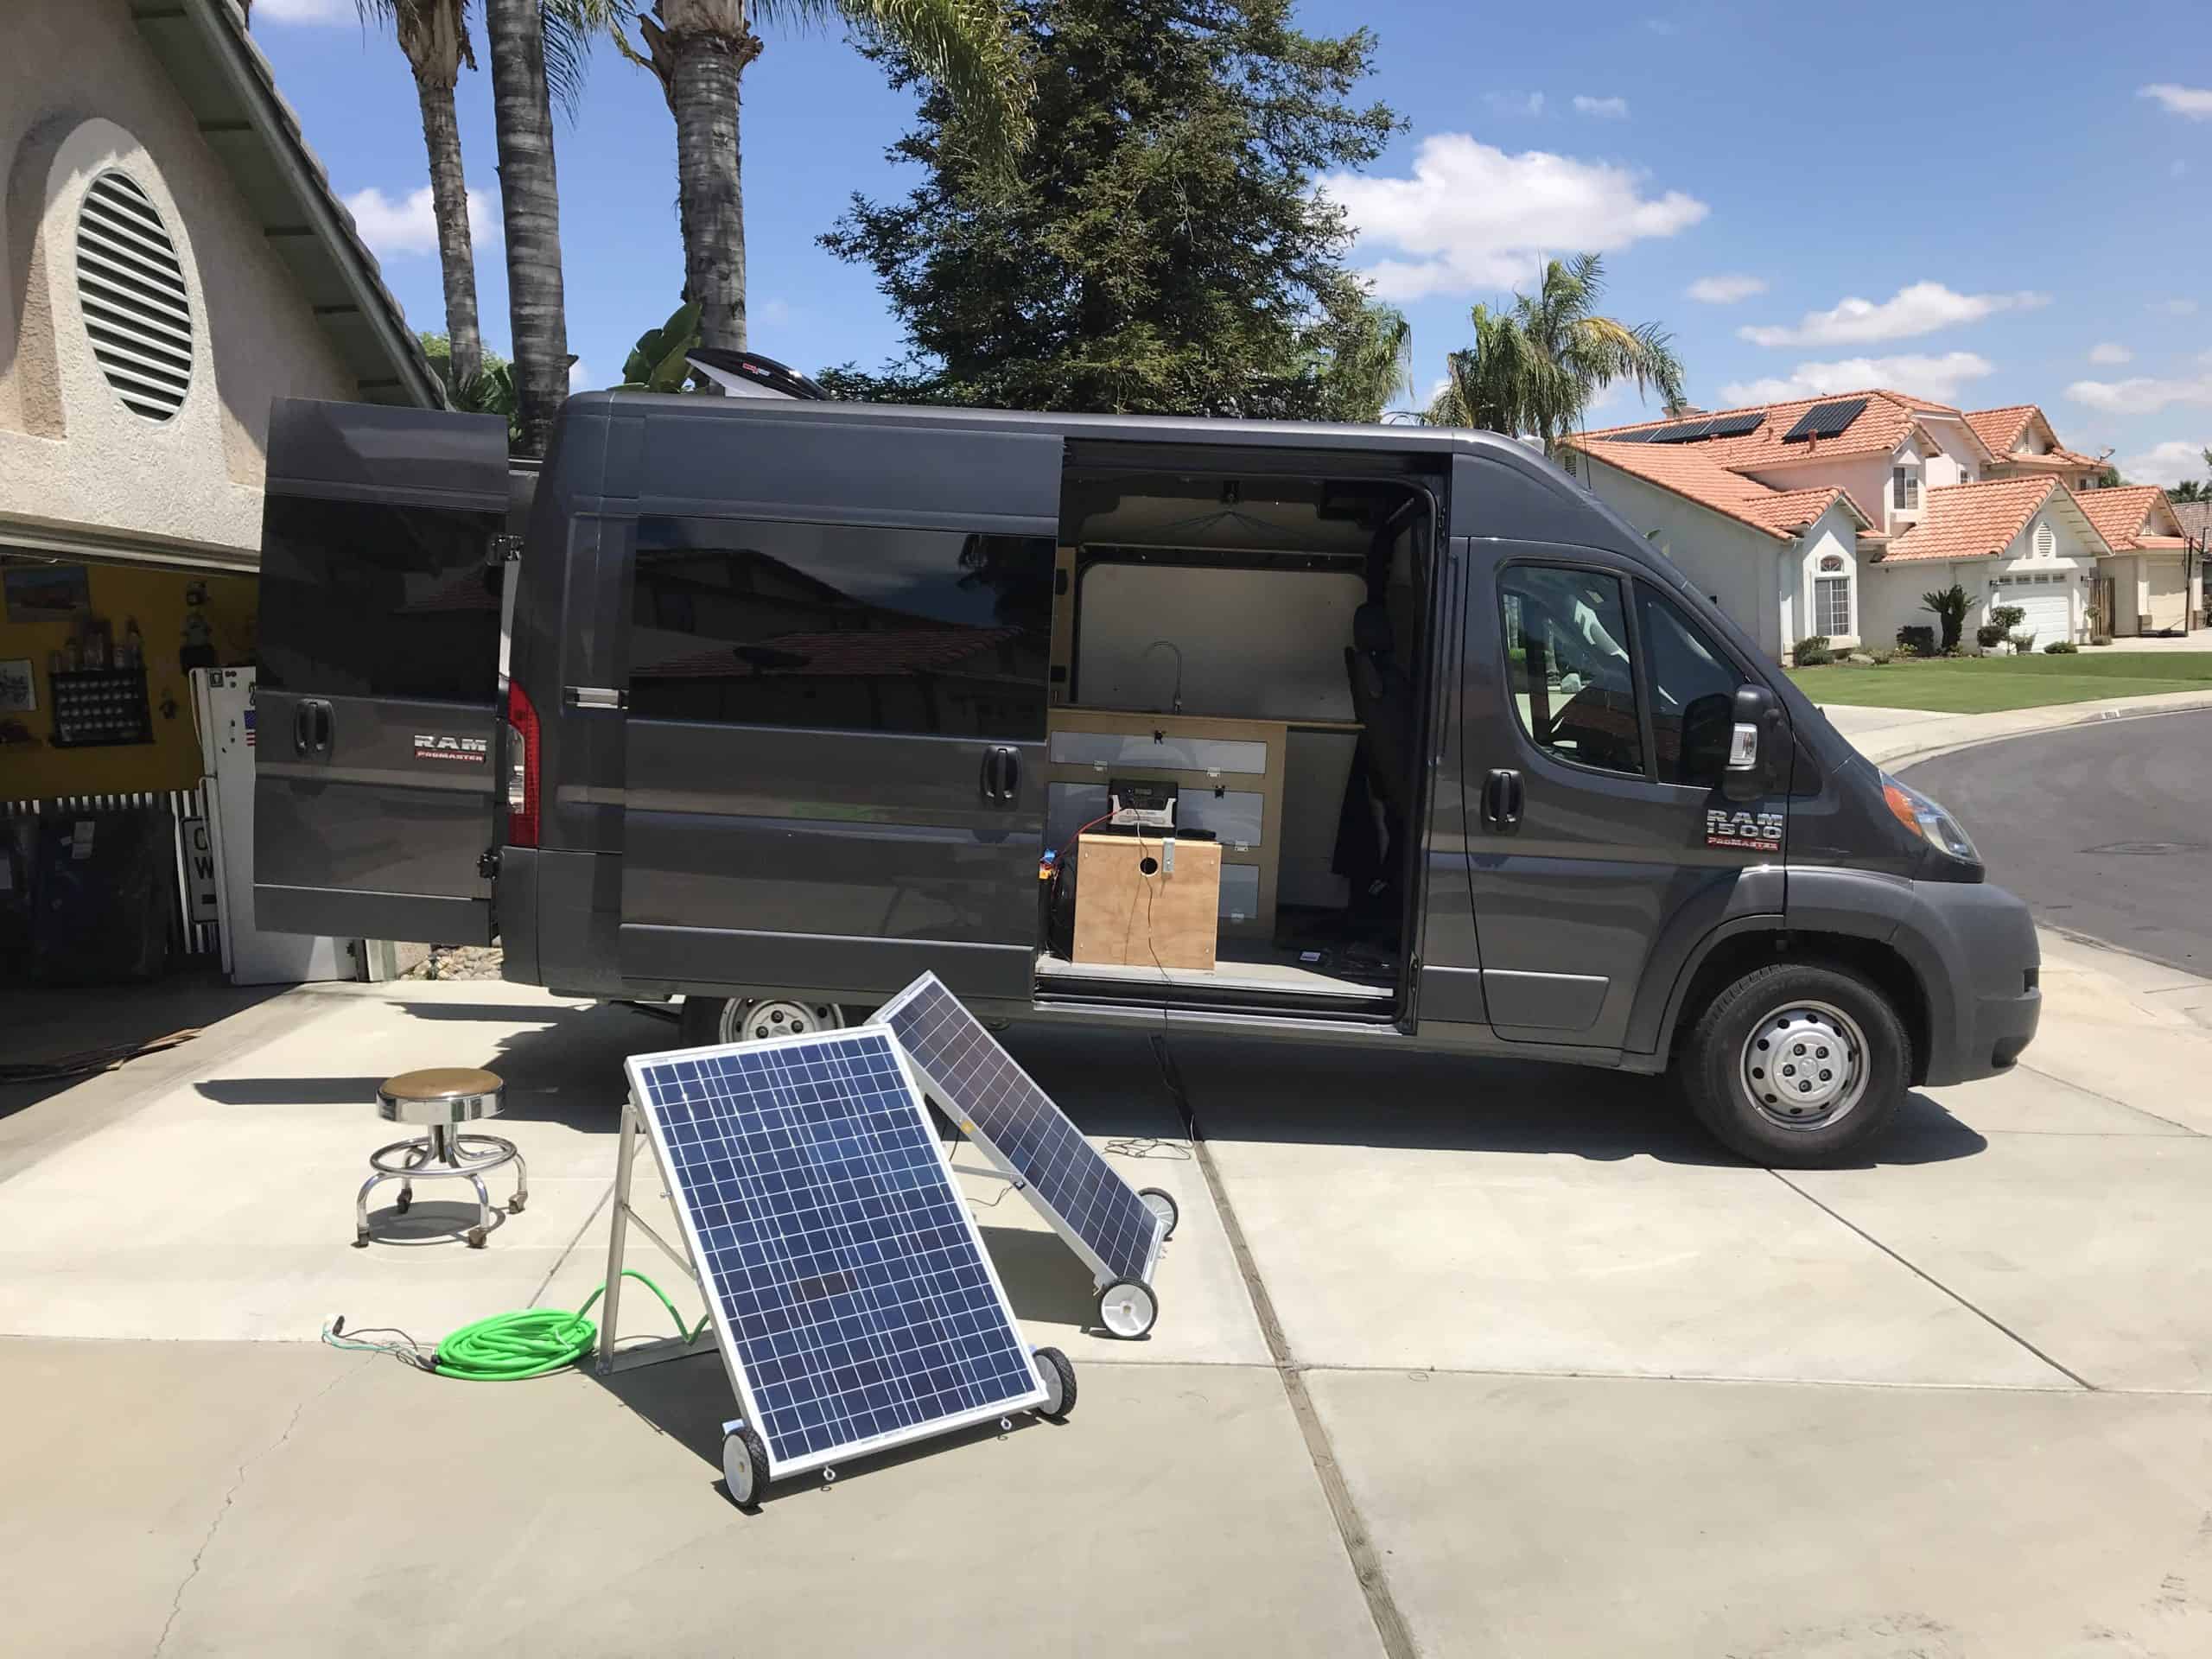
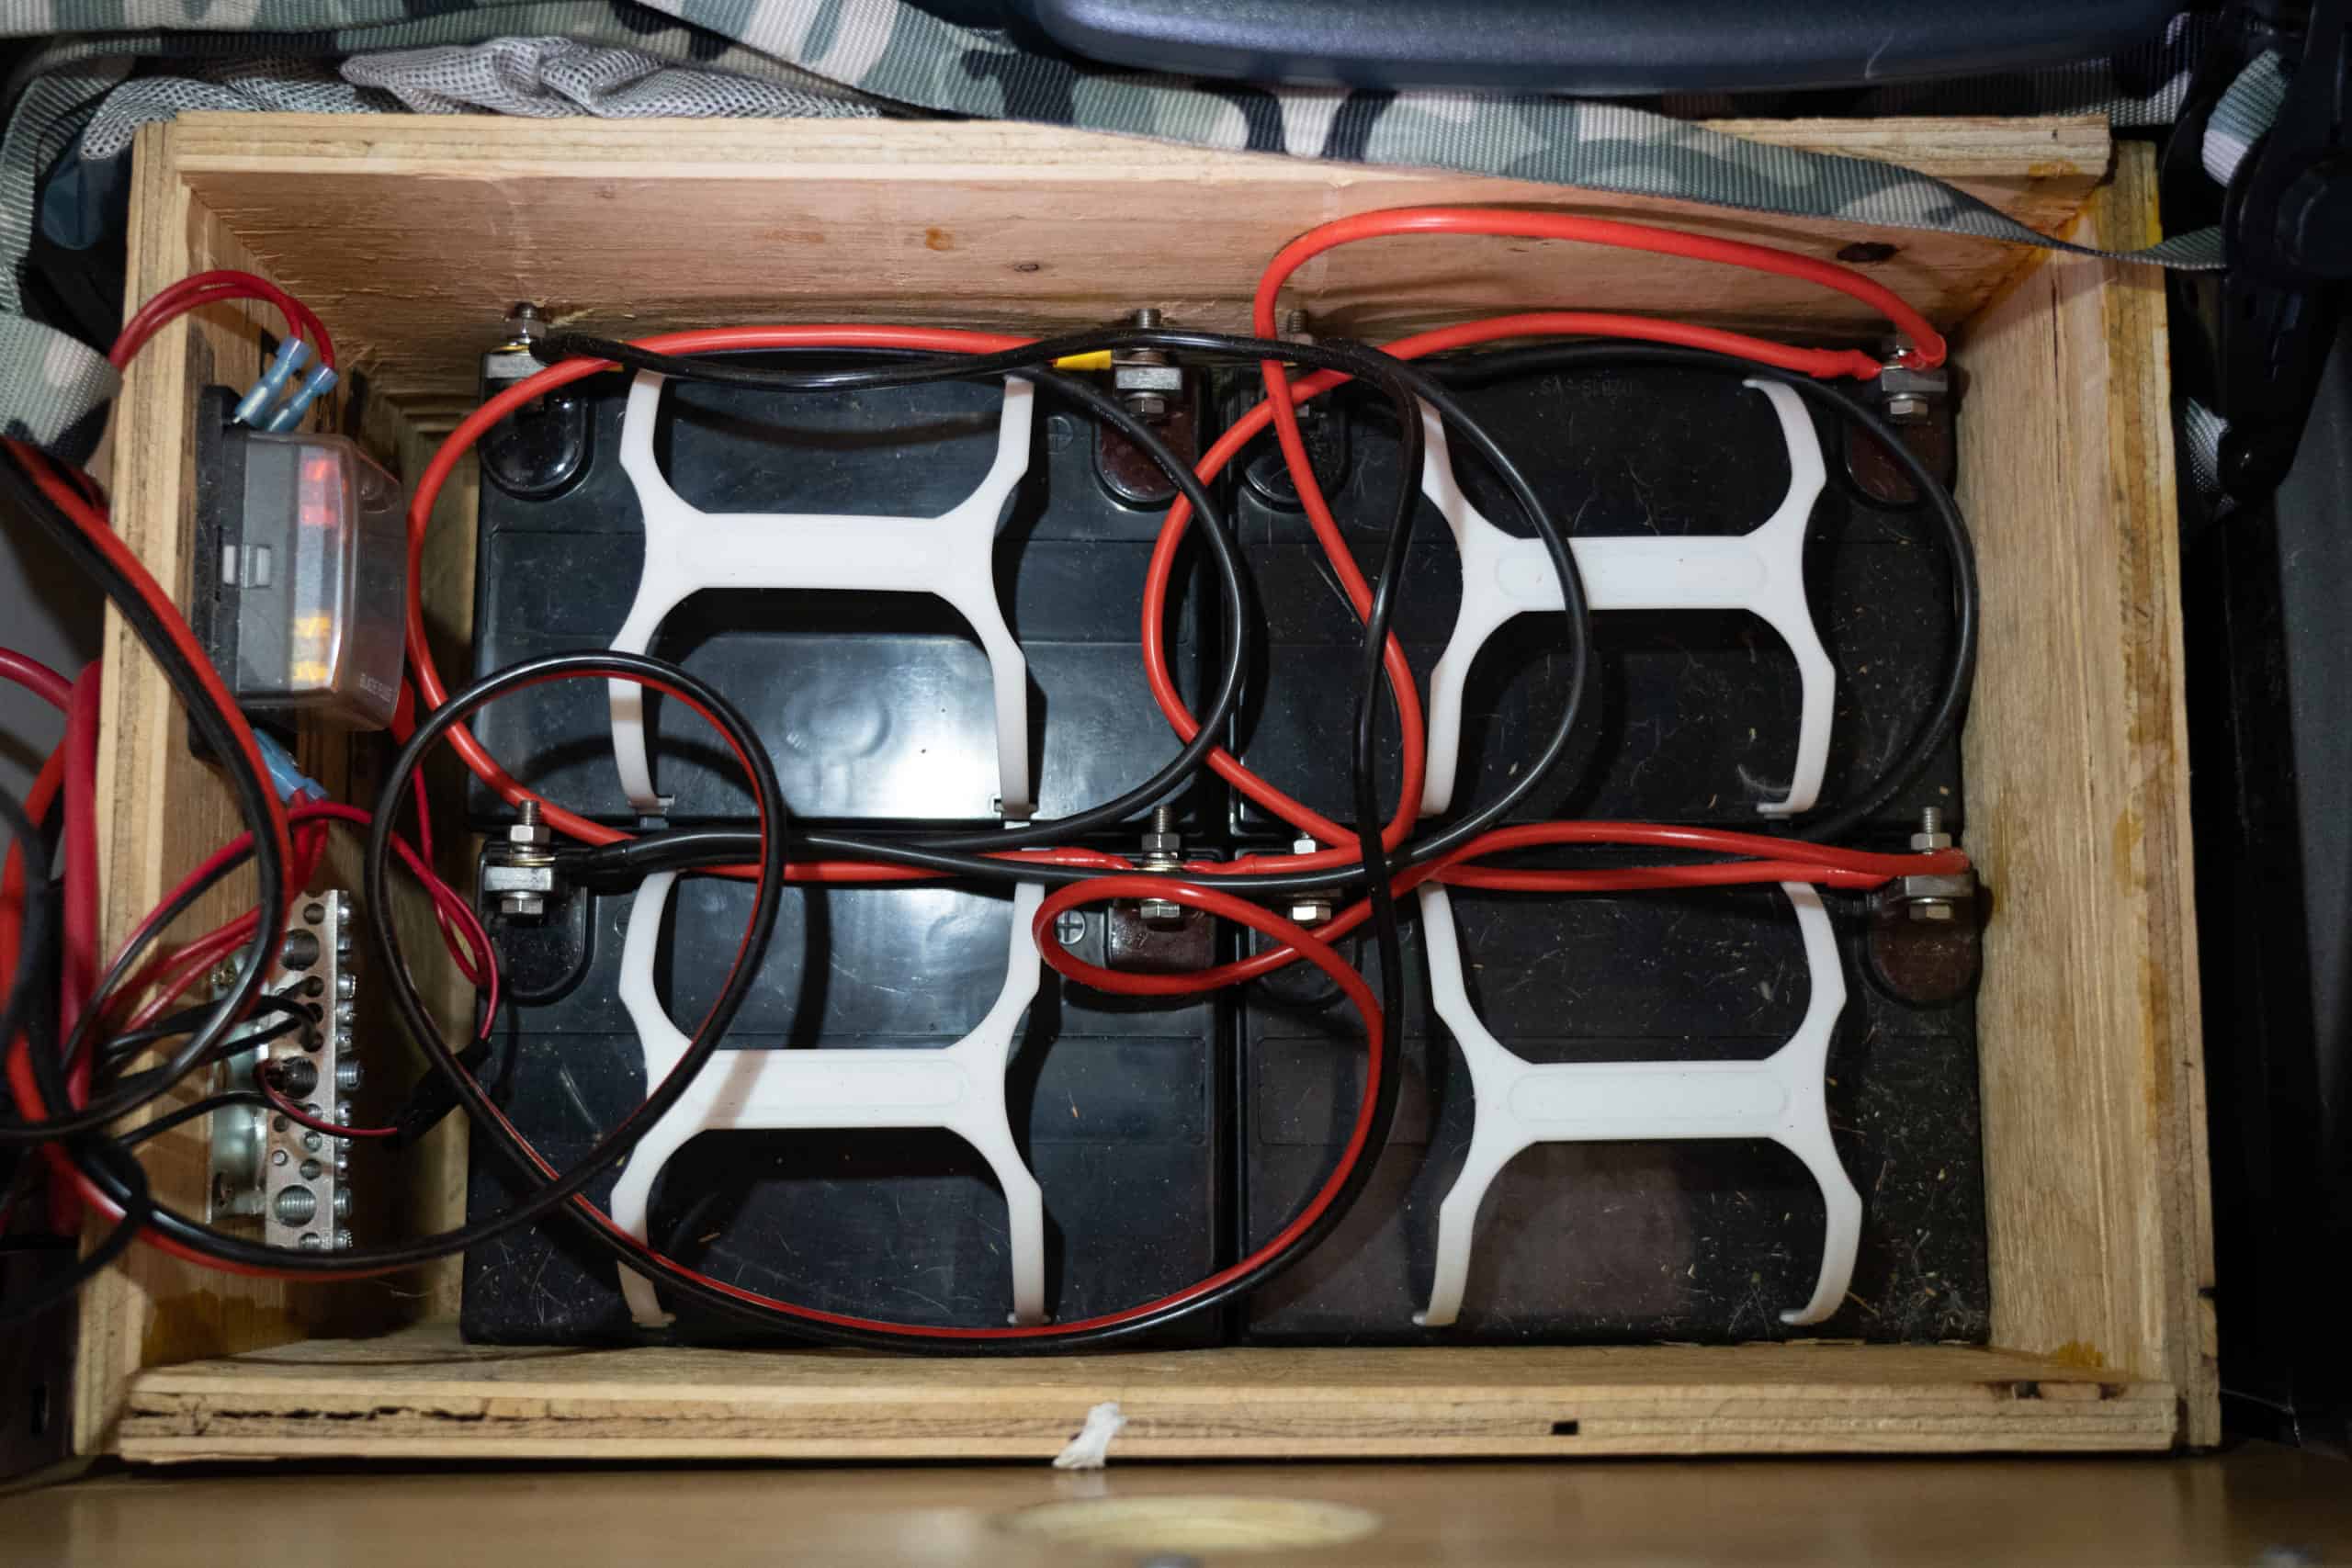
What Michael and Allison’s Setup Looks Like: Our personal “full-timer” setup is a tad more complicated because we only had the Goal Zero Yeti 400 Power Bank when we started. We were cash strapped, so we wanted to make due with what we had. So we “chained” our Goal Zero Yeti 400 to 4 more lead batteries to increase our overall capacity (photo below). We have this hooked up to 2 100 W solar panels (200W total). Our Goal Zero Yeti 400 only allowed for up to 200 Watts of solar. This system has suited our needs, but as you can see is a bit more complicated and involved. Ultimately we do not recommend our personal setup if you’re starting from scratch and have the ability to start off with a bigger Power Bank like we recommended above. It was a more complicated system to figure out and has it’s limitations. See photo below with our complex wiring set-up.
Getting even more customized with your solar and electrical set up:
You can get super intricate and customized with your electrical and solar set up, but we wanted to keep this process as simple and stress-free as possible for you. For instance, building out your own DIY power bank (versus getting a pre-built all-in-one system like the Goal Zero), can be very complicated and beyond the scope of this post.